Did you know that professional chefs spend nearly 40% of their prep time just cutting ingredients? Yet most home cooks never learn proper knife skills, turning what should be a quick 10-minute prep into a frustrating 30-minute chore. If you’ve ever struggled with uneven cuts, crushed garlic, or tomatoes that turn to mush, you’re not alone.
10 min read
In This Article
- How to Hold a Chef’s Knife: The Foundation of All Knife Skills
- The Basic Knife Cuts Every Home Cook Needs to Know
- How to Dice an Onion Like a Professional Chef
- Mastering the Julienne Cut for Restaurant-Quality Vegetables
- Essential Slicing Techniques for Different Ingredients
- Common Knife Skills Mistakes That Slow You Down
- What Knives Do You Actually Need as a Beginner?
- Building Speed and Confidence in Your Knife Work
Mastering essential knife skills isn’t just about looking professional in the kitchen—it’s about safety, efficiency, and actually enjoying the cooking process. When you know how to hold a knife properly and execute basic cuts, everything from meal prep to following recipes becomes infinitely easier.
In this comprehensive guide, we’ll cover the fundamental knife skills every home cook should master, from proper grip technique to the most important cuts that will transform your cooking. Whether you’re a complete beginner or looking to refine your technique, these skills will make you faster, safer, and more confident in the kitchen.
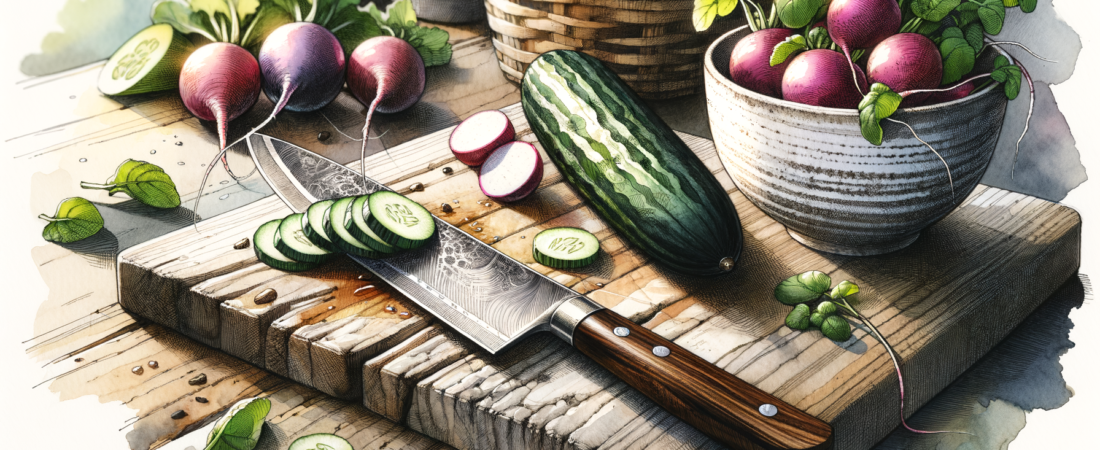
How to Hold a Chef’s Knife: The Foundation of All Knife Skills
Before diving into specific cuts, let’s establish the proper way to hold a chef’s knife. This is where most home cooks go wrong, and it’s the foundation that makes everything else possible.
The correct grip is called the “pinch grip,” and it might feel awkward at first if you’ve been holding knives incorrectly. Place your thumb and index finger on opposite sides of the blade, just above where the blade meets the handle. Your remaining three fingers wrap around the handle. This grip gives you maximum control and prevents the knife from rolling in your hand.
Your non-knife hand is equally important—it’s your “claw hand.” Curve your fingertips under, creating a claw-like shape, with your knuckles forward. This hand guides the food and protects your fingertips. Your knuckles should actually touch the flat side of the blade as you cut, creating a natural guide.
Did You Know? The pinch grip actually reduces hand fatigue by up to 60% compared to gripping the handle alone, according to culinary schools. Professional chefs can prep for hours using this technique without strain.
Practice this grip with a stationary knife first. Hold the knife and gently rock it back and forth on your cutting board without cutting anything. The motion should come from your wrist, not your entire arm. Once this feels natural, you’re ready to start making actual cuts.
The Basic Knife Cuts Every Home Cook Needs to Know
There are dozens of knife cuts in professional cooking, but as a home cook, mastering just five essential cuts will handle 90% of your kitchen tasks. These cuts aren’t just about appearance—they ensure even cooking and proper texture in your finished dishes.
Let’s start with the most fundamental cuts that you’ll use in nearly every recipe. Each cut has a specific size and purpose, and understanding when to use which cut will elevate your cooking immediately.
The Rough Chop: Your Go-To for Casual Cooking
The rough chop is exactly what it sounds like—informal, uneven pieces that range from ½ inch to 1 inch in size. This is perfect for ingredients that will be blended, strained out, or cooked for long periods where uniformity doesn’t matter.
Use the rough chop for vegetables in stocks, ingredients for slow cooker meals, or items that will be pureed. The key is to work quickly—don’t worry about perfection. This cut should take you about 30 seconds per onion once you get the hang of it.
Dice: Small, Medium, and Large
Dicing creates uniform cubes that cook evenly and look professional. There are three standard sizes: small dice (¼ inch), medium dice (½ inch), and large dice (¾ inch). The technique is the same for all three—only the size changes.
For an onion, make horizontal cuts parallel to your cutting board, then vertical cuts, and finally cut across to create perfect cubes. Start with larger dices as a beginner—they’re more forgiving and still look great in finished dishes.
Handpicked items you might love
How to Dice an Onion Like a Professional Chef
Onion dicing is the knife skill that separates confident home cooks from beginners. Once you master this technique, you’ll use it constantly—onions appear in nearly every savory recipe, and proper dicing ensures they cook evenly and don’t overpower your dish.
Start by cutting the onion in half from root to tip, leaving the root end intact on each half. Peel away the papery outer layers. Place one half cut-side down on your cutting board with the root end away from you.
Make 3-4 horizontal cuts parallel to your cutting board, starting about ½ inch from the root end and cutting toward the tip. Don’t cut all the way through—leave about ½ inch connected at the root end. The root holds everything together, preventing the onion from falling apart.
Next, make vertical cuts from top to bottom, again leaving the root end intact. The spacing of these cuts determines your dice size—closer together for small dice, farther apart for large dice. Finally, cut across the onion perpendicular to your other cuts, and perfect cubes will fall away.
This technique works for shallots, garlic, and any other allium. Practice with onions first since they’re inexpensive and you’ll use this skill constantly. A properly diced onion should cook evenly and blend seamlessly into your dishes without chunky surprises.
Mastering the Julienne Cut for Restaurant-Quality Vegetables
The julienne cut creates thin, uniform strips that cook quickly and add elegance to any dish. These matchstick-shaped pieces are typically 2-3 inches long and about ⅛ inch thick. You’ll use this cut for stir-fries, salads, and garnishes.
Carrots are perfect for practicing julienne technique. Start by peeling and trimming your carrot, then cut it into 2-3 inch segments. Cut each segment lengthwise to create flat surfaces, then stack these slices and cut them into thin strips.
The key to consistent julienne is maintaining steady pressure and keeping your cuts parallel. Your claw hand should move steadily backward as you work, maintaining the same finger position. This cut takes practice, but it’s incredibly useful for Asian cuisine and upscale presentations.
Brunoise: The Finest Dice for Sophisticated Cooking
Brunoise is essentially julienne cut turned into tiny cubes—about ⅛ inch on all sides. This ultra-fine dice is used for garnishes, sauces, and dishes where you want flavor without obvious vegetable pieces.
Create brunoise by first making a perfect julienne, then carefully dicing those strips into tiny cubes. This cut requires patience and a sharp knife, but it’s impressive and useful for compound butters, vinaigrettes, and fine dining presentations.
Essential Slicing Techniques for Different Ingredients
Not everything needs to be diced or chopped. Proper slicing techniques are crucial for proteins, tomatoes, and delicate vegetables. The thickness of your slices can make or break a dish—thick tomato slices for burgers, paper-thin for carpaccio.
For proteins like chicken breast or pork tenderloin, slice against the grain for maximum tenderness. The grain refers to the direction of the muscle fibers—cutting perpendicular to these fibers shortens them, making the meat easier to chew.
Tomato slicing requires a sharp knife and a gentle sawing motion. Don’t press down—let the knife do the work. Start with the knife tip touching the tomato, then draw the blade through using the entire edge. This prevents crushing and maintains clean edges.
How to Slice Herbs Without Bruising
Fresh herbs are delicate and can turn black if handled roughly. For basil, mint, and other tender herbs, use the “chiffonade” technique. Stack several leaves, roll them tightly, then slice across the roll to create thin ribbons.
For heartier herbs like rosemary or thyme, remove the leaves from stems first, then use a rough chop. The oils in these herbs are more stable and won’t bruise as easily as delicate leaves.
Common Knife Skills Mistakes That Slow You Down
Even experienced home cooks often develop bad habits that make prep work harder than it needs to be. These mistakes not only slow you down but can also be dangerous and lead to uneven cooking.
The most common mistake is using a dull knife. Contrary to intuition, dull knives are more dangerous than sharp ones because they require more pressure and are more likely to slip. A sharp knife cuts cleanly with minimal force, giving you better control.
Another frequent error is cutting on the wrong surface. Glass cutting boards look nice but dull your knives quickly. Plastic boards can harbor bacteria in cut marks. Wood or bamboo boards are gentler on knife edges and naturally antimicrobial.
Poor knife maintenance is also common. Many home cooks never sharpen their knives or use inappropriate tools like pull-through sharpeners that damage the blade. Professional sharpening once or twice a year, combined with regular honing, keeps knives in peak condition.
✓ Pros of Mastering Knife Skills
- Faster meal prep (up to 50% time savings)
- Safer cooking with proper technique
- Even cooking from uniform cuts
- Professional-looking presentations
- More enjoyable cooking experience
- Better ingredient utilization (less waste)
✗ Challenges for Beginners
- Initial learning curve feels awkward
- Requires consistent practice to master
- Need to invest in quality knives
- Muscle memory takes time to develop
- Some cuts require significant practice
- Maintenance and sharpening needed
What Knives Do You Actually Need as a Beginner?
You don’t need a $500 knife set to master basic knife skills. In fact, most professional chefs rely on just 2-3 knives for 95% of their work. Starting with fewer, higher-quality knives is better than having a drawer full of mediocre ones.
An 8-10 inch chef’s knife is your workhorse. This versatile blade handles chopping, dicing, slicing, and most other tasks. Look for a knife that feels comfortable in your hand—weight and balance are personal preferences, so try before you buy if possible.
A 3-4 inch paring knife handles small, detailed work like peeling, coring, and trimming. This complements your chef’s knife for tasks where precision matters more than size.
A serrated bread knife (8-10 inches) is essential for crusty breads, tomatoes, and other items with tough exteriors and soft interiors. The serrated edge cuts through these foods without crushing them.
Knife Maintenance Basics Every Cook Should Know
Proper maintenance extends knife life and keeps them performing at their best. Hone your knives regularly using a honing steel—this realigns the edge without removing metal. True sharpening should be done professionally or with a quality stone system.
Always hand wash knives immediately after use and dry them completely. Never put quality knives in the dishwasher, as the harsh detergents and banging against other items will damage the edge and handle.
🎯 Bottom Line
Mastering essential knife skills is one of the most impactful things you can do to improve your cooking. Start with proper grip and basic cuts like dice and julienne. Practice regularly with inexpensive ingredients like onions and carrots. Focus on safety and consistency over speed—speed comes naturally with practice. With just a few quality knives and regular practice, you’ll transform from a hesitant chopper into a confident prep cook who actually enjoys the process.
Building Speed and Confidence in Your Knife Work
Speed comes with practice, but there are specific techniques that help you build efficiency safely. Professional chefs develop rhythm and flow that makes knife work look effortless, and you can develop this too with the right approach.
Start slowly and focus on consistency rather than speed. It’s better to make uniform cuts at a moderate pace than to rush and create uneven pieces that cook poorly. Set up your workspace efficiently—have a trash bowl nearby, organize ingredients before you start, and keep your cutting board stable with a damp towel underneath.
Practice the same cuts repeatedly until they become muscle memory. Spend 10 minutes a few times per week just practicing your knife grip and basic cuts on inexpensive vegetables. This focused practice is more valuable than years of occasional cooking.
Watch your rhythm develop as you become comfortable. Professional knife work has a steady, almost meditative quality that comes from confidence in your technique. Focus on smooth, controlled movements rather than choppy, hesitant cuts.
You Might Also Like
Ready to put these skills to work? Start with simple recipes that showcase good knife work—a classic French onion soup, fresh salsa, or stir-fry vegetables. As you practice these essential knife skills, you’ll find that cooking becomes more enjoyable and efficient. Share your progress with fellow home cooks, and don’t forget to explore quality knives and cutting boards that make the learning process even more rewarding.
Written by Editorial Team
Our editorial team is dedicated to bringing you the latest insights, tips, and product recommendations.