Contouring has become a makeup staple, but for beginners, it can feel overwhelming. The good news? You don’t need to be a professional makeup artist to master this technique. This comprehensive guide will walk you through everything you need to know about contouring for your specific face shape, making it easy to enhance your natural features beautifully.
7 min read
In This Article
Whether you have a round, oval, square, heart, or diamond-shaped face, understanding how to contour correctly can help define your bone structure and create stunning dimension. Let’s dive into the fundamentals and discover how to make contouring work for you.
Understanding the Basics of Contouring
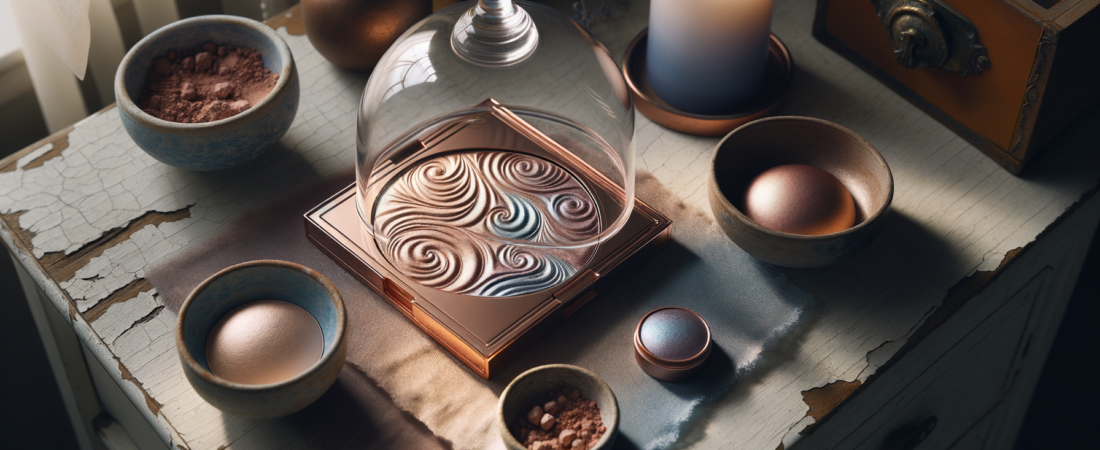
Contouring is the art of using makeup to create shadows and highlights that enhance your facial structure. The technique involves applying darker shades to areas you want to recede and lighter shades to areas you want to bring forward or emphasize.
💡 Pro Tip
Start with a light hand! It’s easier to build up your contour gradually than to remove excess product. Remember, the goal is to enhance your natural features, not create dramatic shadows.
The key to successful contouring lies in understanding your face shape and knowing where to place your products. Unlike Instagram-style heavy contouring, everyday contouring should look natural and seamless.
Essential contouring products include:
- Contour powder or cream (2-3 shades darker than your skin tone)
- Highlighter (2-3 shades lighter than your skin tone)
- Blending brushes or beauty sponges
- Good lighting for application
The most important rule? Blend, blend, blend! Harsh lines are the enemy of natural-looking contour.
Identifying Your Face Shape
Before you start contouring, you need to determine your face shape. This step is crucial because different face shapes require different contouring techniques to achieve the most flattering results.
Here’s how to identify your face shape:
✨ Quick Face Shape Test
Stand in front of a mirror and pull your hair back. Using a washable marker or lipstick, trace the outline of your face on the mirror. Step back and examine the shape you’ve created.
Round Face: Width and length are nearly equal, with soft, curved lines and fuller cheeks.
Oval Face: Length is greater than width, with gently rounded edges and a slightly narrower jawline than the forehead.
Square Face: Width and length are similar, with a strong, defined jawline and forehead of equal width.
Heart Face: Wider forehead that narrows down to a pointed chin, often with prominent cheekbones.
Diamond Face: Widest at the cheekbones, with a narrow forehead and chin of similar width.
Understanding your face shape helps you determine which areas to contour and highlight for the most balanced, harmonious look.
Handpicked items you might love

Contouring Techniques for Round Faces
If you have a round face, your goal is to create more definition and add some angularity to your soft, curved features. The key is to contour along the sides of your face to create the illusion of length and structure.
Where to contour:
- Along the hairline from temple to temple
- Underneath the cheekbones, blending from the ear toward the center of your cheek
- Along the jawline to create more definition
- Sides of the nose (if desired)
Where to highlight:
- Center of the forehead
- Bridge of the nose
- Tops of the cheekbones
- Center of the chin
🎯 Round Face Pro Tips
Apply contour in a “3” shape on each side of your face – starting at the hairline, curving under the cheekbone, and ending along the jawline. This creates beautiful dimension while maintaining a natural look.
For round faces, avoid contouring the apples of your cheeks, as this can make your face appear wider. Instead, focus on the hollows beneath your cheekbones and blend upward and outward.
Contouring for Oval, Square, and Heart-Shaped Faces
Oval Faces – The Balanced Approach:
Oval faces are considered the most balanced face shape, so your contouring should be subtle and focus on enhancing your natural features rather than dramatically changing them.
- Lightly contour the hollows of your cheeks
- Add a touch of contour to the temples if you want to add some definition
- Highlight the center of your forehead, nose bridge, cheekbones, and chin
Square Faces – Softening Strong Lines:
For square faces, the goal is to soften the strong, angular jawline and create more curved, feminine lines.
- Contour the corners of the forehead to round out the hairline
- Apply contour under the cheekbones, blending in a circular motion
- Soften the jawline by contouring the corners of the jaw
- Highlight the center of the forehead and chin to create length
⚡ Quick Tip for Square Faces
Use a fluffy brush to apply contour in gentle, circular motions rather than harsh lines. This helps create the soft, curved effect you’re aiming for.
Heart-Shaped Faces – Balancing Proportions:
Heart-shaped faces typically have a wider forehead and narrower chin, so the goal is to balance these proportions.
- Contour the sides of the forehead to reduce its width
- Lightly contour under the cheekbones
- Highlight the chin to add width and balance
- Add highlight to the center of the forehead, nose, and cheekbones
The key for heart-shaped faces is not to over-contour the forehead, as this can create an unnatural look. Instead, focus on subtle shading that gradually narrows the forehead while bringing attention to the lower half of the face.
Diamond Face Contouring and Common Beginner Mistakes
Diamond Face Contouring:
Diamond faces have the widest point at the cheekbones, with a narrower forehead and chin. Your goal is to balance these proportions by softening the cheekbone area and adding width to the forehead and chin.
- Lightly contour the outer edges of the cheekbones to reduce their prominence
- Add a subtle contour to the very top of the forehead
- Highlight the center of the forehead to add width
- Highlight the chin generously to balance the narrow jaw
- Apply highlight to the center of the nose and under the eyes
⚠️ Common Beginner Mistakes to Avoid
- Using the wrong shade: Your contour should be cool-toned and only 2-3 shades darker than your natural skin tone
- Forgetting to blend: Harsh lines are a dead giveaway of amateur contouring
- Over-applying product: Start light and build up gradually
- Wrong brush choice: Use fluffy, dense brushes for blending and smaller, more precise brushes for placement
- Contouring in poor lighting: Natural light or good artificial lighting is essential for proper application
Additional Tips for All Face Shapes:
Regardless of your face shape, these universal tips will help you achieve better contouring results:
- Set your base: Always apply foundation and concealer before contouring
- Use the right tools: Invest in good brushes or beauty sponges for seamless blending
- Practice makes perfect: Don’t expect to master contouring overnight
- Consider your lifestyle: Adapt the intensity based on whether it’s for everyday wear or special occasions
Product Recommendations and Final Tips
Choosing the right products can make or break your contouring game. Here are some beginner-friendly options across different price ranges:
Drugstore Options:
- Cream contour sticks for easy blending
- Powder palettes with multiple shades
- All-in-one contour and highlight kits
Mid-Range Favorites:
- Buildable powder formulas
- Cream-to-powder products
- Professional-quality brush sets
🌟 Your Contouring Journey Starts Now!
Remember, contouring is about enhancing your natural beauty, not covering it up. Start with these basic techniques, practice regularly, and don’t be afraid to experiment to find what works best for your unique features.
Final Success Tips:
- Take photos in different lighting to check your work
- Don’t be afraid to ask for help at makeup counters
- Watch video tutorials for visual guidance
- Keep practicing – even makeup artists continue learning
- Most importantly, have fun with it!
Contouring should enhance your confidence, not stress you out. Start with subtle applications and gradually build your skills. With patience and practice, you’ll develop a contouring routine that makes you feel absolutely radiant every day.
You Might Also Like
Remember, the best contour is one that looks like you, just enhanced. Your unique face shape is beautiful, and contouring is simply a tool to help you showcase your natural features in the most flattering way possible.
Written by Editorial Team
Our editorial team is dedicated to bringing you the latest insights, tips, and product recommendations.